Posted on

Planting clematis

Clematis Pflanzung

The basics of planting clematis so that you can enjoy them for a long time. Clematis can be planted all year round as long as the ground is not completely frozen.

The best time to plant clematis in the garden is August to October. This is directly related to the annual rhythm, root formation and soil temperature.

The soil temperature plays a decisive role here, as does the appropriate soil moisture, which goes without saying!

This planting date is considered optimal not only for clematis, but also for many other plants.

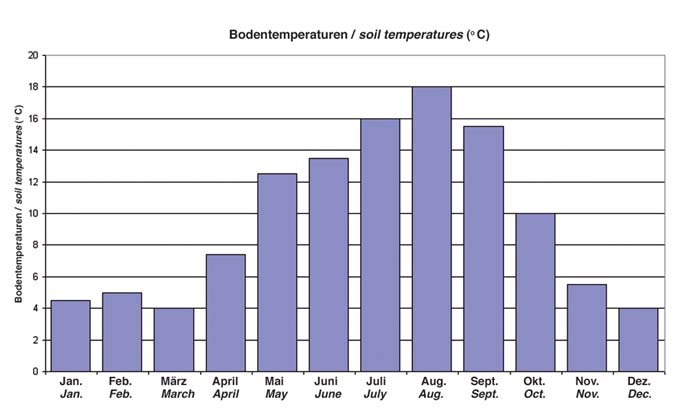
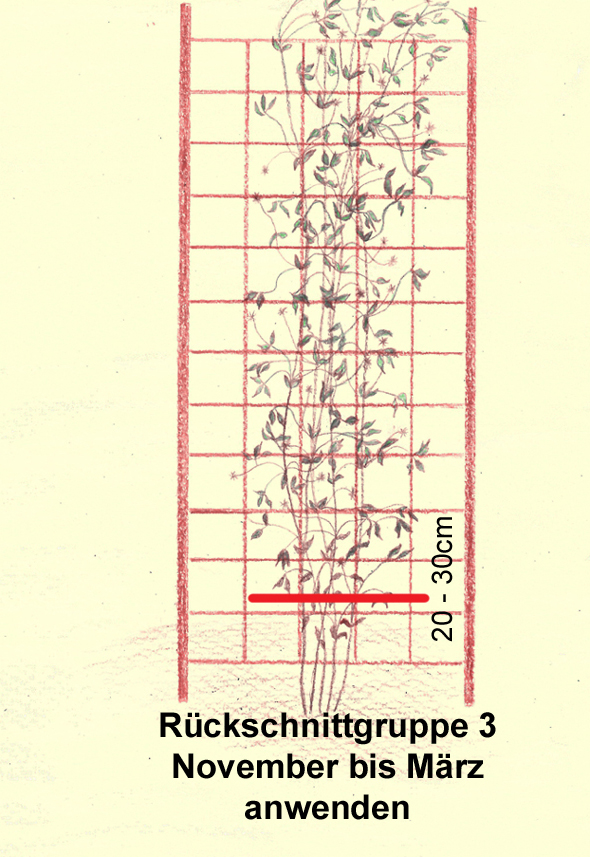
In contrast to air temperatures, soil temperatures fall only slowly in the fall. A certain amount of heat from the summer months is still “stored” in deeper layers of soil. We take advantage of this for the fall planting. At a depth of 20-30 cm (trench depth), the soil temperature is still above 10°. In such conditions, the plants will still form new roots and your clematis will grow shortly.

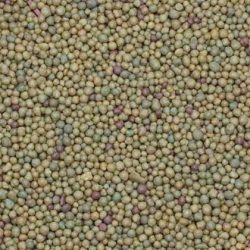
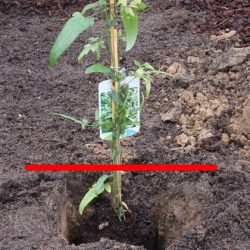
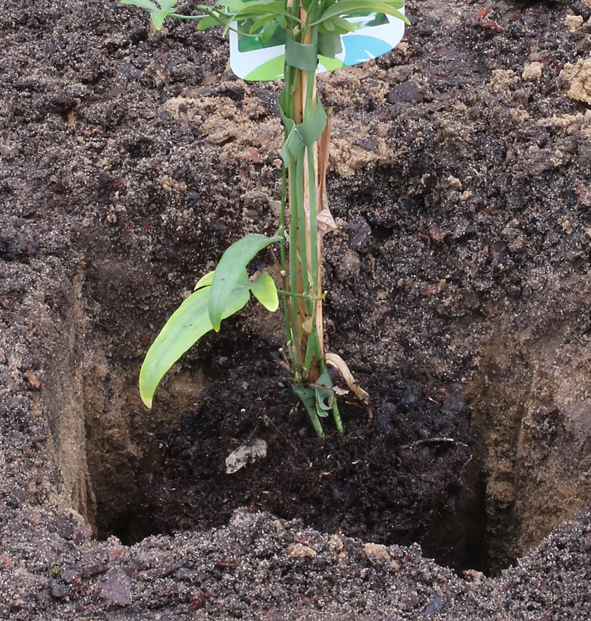
When planting, the planting hole should be one spadeful in size and depth. Do not forget to water after planting! Do not water in or trample down! Lightly pressing down is sufficient. The soil must be rich in humus, loose and well-drained! At the same time, it must be able to store moisture. If your garden soil does not provide this, you should take measures to improve the soil. There are numerous soil improvers available from specialist retailers. The following products are available: Various rock powders, compost, lava stones, pumice, bark products, wood fibers, coconut fibers, rice husks, expanded clay and much more. Peat-free substrates are also available and are on the increase! In recent years, potting soils and substrates with mycorrhizal fungi, Bacillus subtilis and Trichoderma harzianum have also increased significantly. These substrates with microorganisms support root formation and prevent the spread of harmful fungi in the soil! We have been supplying our clematis with these microorganisms for several years now.
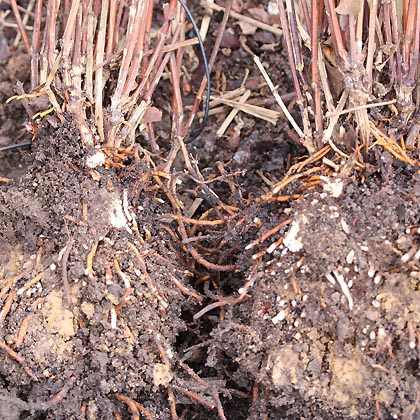
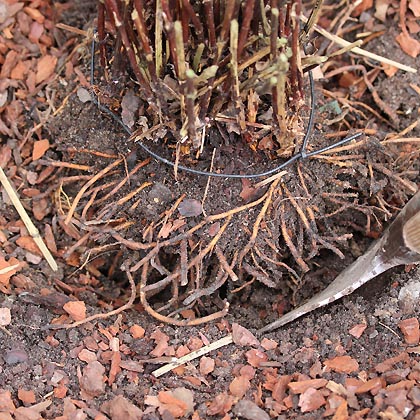
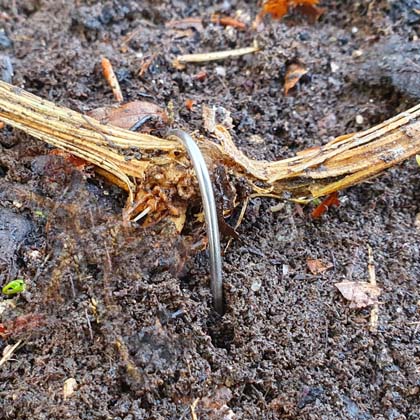
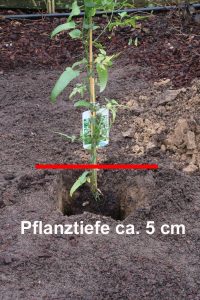
Planting depth

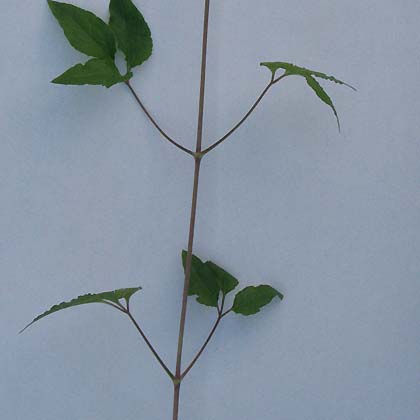
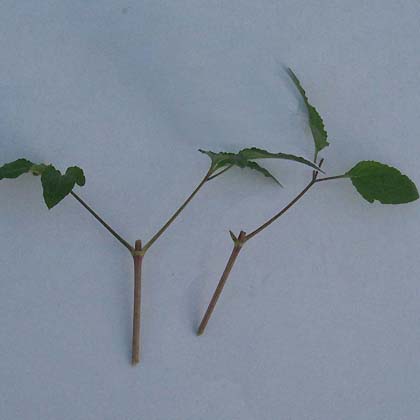
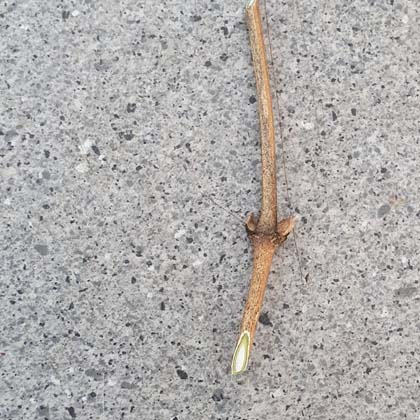
Clematis hybrids, Clematis viticella, Clematis texensis and Clematis perennial forms should be planted deep enough so that one or two pairs of eyes are included in the soil, which is about 5-7 cm deeper than they were previously cultivated in a pot. Clematis alpina, Clematis montana and Clematis orientalis are planted a little higher. This is helpful so that they do not suffer badly from moisture!

The planting distance

Planting on walls or fences. The distance from plant to plant is approx. 1/3 of the growth height, which in many cases is 0.80 – 1.20 m. The distance to the wall plays a subordinate role and can be approx. 20-30 cm. A distance of 30-40 cm from other plants, such as climbing roses, is sufficient. You can plant 2-3 clematis together directly on pergola posts and obelisks. The prerequisite here is light from all sides.

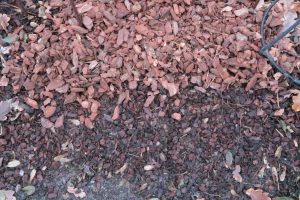
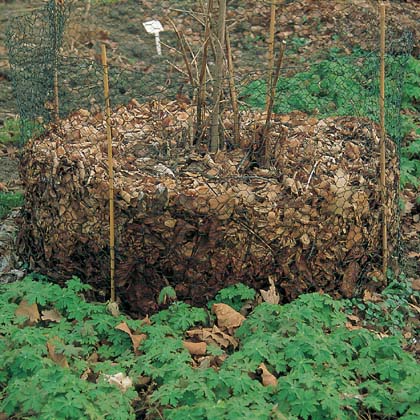
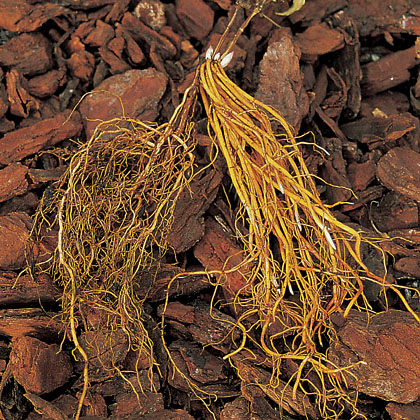
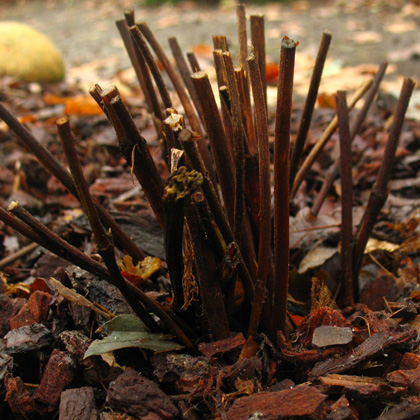
Finally, the planting site is ideally covered with bark mulch. It is important preferably use sterile mulch material made from pine or pine bark instead of using mulch from hardwood or mixed forest!

Pine bark lasts for many years and is preserved by the tree resin content.

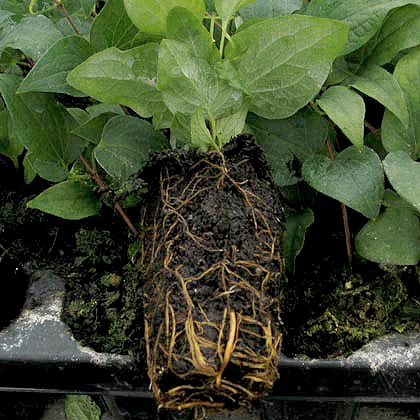
Planting in containers

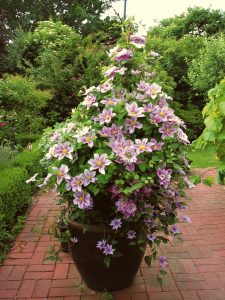
You can also plant clematis in tubs and containers all year round. The potting soils and substrates should also meet the same criteria as those to be used for outdoor planting. A coarse structure and good water drainage are important. Most clematis can remain in the same container for several years. The larger and deeper the container, the longer the clematis can stay in it. The minimum volume is 10 to 12 liters of soil per plant per year. The dwarf varieties with the longest possible flowering periods or perennial clematis are best suited. Strong-growing varieties are less suitable. The container should contain at least 20 liters of soil. The bigger, the better. Depending on the characteristics of the variety, you should also use a climbing option for the clematis.

Casemate, top winter storage

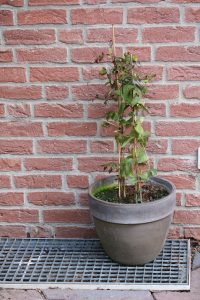
Overwintering clematis in containers. Most clematis can manage without additional winter protection, while some other clematis varieties require winter protection. This is the case with the florida and cirrhosa varieties, for example. It is often sufficient to place the container with the clematis in a frost-tempered place or to protect the pot with a fleece before heavy frost sets in. In addition, watering over winter is hardly necessary. The substrate is often frozen dry after long periods of frost. Therefore, a little water is added again after thawing.

Posted on

Propagation of clematis

Propagation by sowing

Sowing is a classic example of how to propagate clematis. Many botanical clematis species can be propagated by sowing. Germination takes very different times and can be between 3 weeks and up to 14 months, because some clematis are cold germinators (frost germinators). When sowing, it is genetically determined that the seedlings are not always identical to the starting plant (mother plant). Domestic clematis are usually “real”.

Propagation by cuttings

Propagation by cuttings is best done from late spring to early summer. This requires some experience and skill. In gardening practice, large quantities of plants are produced. One speaks here of mass proliferation. The procedure is similar to that of other plants that are propagated through cuttings.

Before cutting the cuttings
Cuttings, cut
A look at our propagation
Timber
Leaf chute

The differences to other cuttings are not of great importance. Rooting takes 21 to 35 days. Mainly clematis varieties that are easy to root are propagated. This explains why there is often only a very limited range available. (e.g. at discounters) It is common practice to cover the cuttings with foil when propagating them. This ensures a high level of humidity and prevents the cuttings from drying out. Regular ventilation is essential. Direct sunlight must be avoided.

Clematis montana and some other species can also be easily propagated by cuttings.
This can be done in the winter months. You must always work frost-free. If you don’t have a suitable greenhouse, you can make do with a leaf chute.

Propagation by division, root suckers and suckers

Division
Division, perennial clematis
Division

Perennial clematis can also be propagated by division. The clematis should be at least 3 years old before dividing the clematis. In practice, many garden perennials are propagated by division. Hibernation, from November to February, is the best time for this. You can also divide clematis that have been cultivated in a container at this time. Division also means rejuvenation and vitalization in one.

Root runners
Root runners
Floor sinks

Some clematis form root runners .
These include: Clematis orientalis, Clematis alpina, Clematis socialis, Clematis heracleifolia and others. So it is not surprising that a new clematis has established itself in the immediate vicinity of the “parent plant”. Division is also a suitable method of propagation here. Individual clematis can also be propagated very well by lowering them into the ground. As a hobby gardener, this is a safe method of propagation. It takes considerably longer than with cuttings. For many varieties it is 2 – 3 months with this propagation method. You can do lowering almost all year round.

Propagation by grafting

Propagate clematis by grafting. It is probably the “supreme discipline” of all clematis propagation methods! There are only a few growers or companies worldwide that propagate clematis by grafting.

The practice of grafting has almost been lost. It was introduced 110 years ago in the Pinneberg district by Max Krause. He had learned clematis cultivation in Great Britain and virtually brought it with him. My father, Friedrich Westphal senior, had worked in Max Krause’s company for many years until he set up his own business in 1953.

Clematis grafting is a form of nurse grafting by lateral plating. Experts are familiar with a comparable method of propagation for conifers. Turn two into one! The “nurse”, Clematis vitalba, serves as a grafting rootstock and brings rooting capacity from one year of previous cultivation to the propagation. The scions grow together with the rootstock after 14 – 21 days and start growing immediately. Even during this growth phase, the scions begin to form their own roots, so that two different and equivalent root systems are formed. The rootstock (Clematis vitalba) provides vigorous and healthy growth, and Clematis vitalba is also immune to clematis wilt! The former wounds caused by grafting are compensated for by a rapid healing process with callus formation. Entry points for various fungal diseases are thus successfully closed from the outset. The fine root system is usually located in the upper 20 – 40 cm layers of soil.

The “real” thick-fleshed roots have storage capacity and can penetrate very deep into the soil (up to 1.50 m). Dry periods can be bridged very well. The decisive advantage of these two root systems is that the clematis adapts independently to the new soil conditions. No other method of propagation can achieve this! My customers have been benefiting from this advantage for many years without really knowing it. 👍😉

A greenhouse is essential for propagation! The best time for grafting is the month of March. A clematis from this type of propagation is ready for sale with flowers for the first time in August/September (7 months later). (For comparison: a clematis propagated from cuttings takes 12-14 months to flower for the first time)

Wild shoots that could sprout from the rootstock are ruled out with clematis. Among other things, the problem with wild shoots in rose grafting is well known.

Posted on

Clematis diseases and pests

Krankheit und Schädlinge

What diseases and pests can occur in clematis?

Clematis diseases

Clematis wilt = Phoma Clematidina (former name Ascochyta Clematidina)

The No.1 topic in the cultivation of clematis. All clematis can be affected, but mainly large-flowered hybrids can perish. In the case of small-flowered species, there is usually only a latent infection that is hardly noticed. Such affected clematis are resistant or even immune and do not die from it! Phoma is a vascular parasitic fungal disease that can affect all parts of the clematis plant. (leaves, stems and roots). This fungal disease is usually introduced unnoticed. The leaves are always infested first! This initially manifests itself as small irregular spots in the lower part of the “new” clematis. An infection attacks from the underside of the leaf and then penetrates the entire leaf tissue, which eventually turns brown and dies.

Phoma on clematis hybrids

An infection progresses quickly from the bottom up. Temperature, light conditions and the presence of water play a decisive role here. The fungal spores may also have been carried over many kilometers or come from the immediate vicinity. The fungal spores can only establish and sprout if water is available for several hours and temperatures are well above 20°. Other infection factors are: Damage to shoots, especially near the ground, or direct root damage if fungal spores have been washed into the soil. This infection often occurs in the second or third year after planting. The latter always happens if a leaf infection has previously occurred or the newly purchased clematis has already brought the fungal spores with it in the pot. When buying new plants, particular care must be taken to ensure that the lower leaves do not have any brown spots, however small they may be. Once the disease is present, it is almost impossible to combat.

The only way to permanently establish healthy clematis in the garden is to use small-flowered clematis species and their varieties!

Phoma on botanical species of clematis

What can be done to prevent this disease? The highest priority is to purchase healthy plants. If possible, position the clematis so that the foliage can dry quickly after rainfall.
Water and irrigate in such a way that the foliage remains dry. Choose an airy and cool location, because the cooler the better. Wind movement also helps to keep clematis healthy. If you recognize the first signs of a leaf infection, it is helpful to remove the infected leaves immediately.
Control measures can be initiated with various fungicides.
Fungicides that are commercially available against various leaf spots can be used. Biological agents are also available. Here, Trichoderma fungi and Bacillus subtilis are the most common and available antagonists. Various plant strengthening agents can also be used to help.

Powdery mildew

Powdery mildew
is widespread and occurs on many other plants. Native shrubs, perennials and ornamental plants can also be infested. Fortunately, only a few clematis are affected. The weather has a major influence on the spread of mildew. In clematis, infection usually begins in late summer or fall. As winter dormancy is already imminent at this time, major damage is not to be expected. Powdery mildew penetrates the surface of the leaves and can be recognized by a mealy, white coating on the stems and then on the leaves. Later, flowers can also be infested. Black spots become visible in the late stages. Powdery mildew is still easy to combat in the early stages. If you wait too long, it becomes much more difficult to eliminate mildew.

Downy mildew

Downy mildew
differs from powdery mildew in that it is mainly found on the underside of the leaves and penetrates much deeper into the plant tissue. This is a rather gray coating that looks furry. The upper side of the leaf turns pale green, then yellow and later brown-black. Downy mildew rarely occurs.

Botrytis, gray mold

Gray mold
is a weak parasite and occurs primarily in high humidity. A lack of light can also lead to the spread of gray mold (Botrytis). This usually first manifests itself on the older leaves in the lower part of the plants. Young shoots can also be infested under extreme infestation pressure.

Phytophtora, Rhizoctonia and others.

Various root diseases
such as Pythium, Phytophthora, Rhizoctonia and Fusarium can damage clematis in the root area. These diseases are often confused with clematis wilt, because at first glance they look similar. The diseases mentioned can occur on many cultivated plants or be introduced by them. Clematis collapse within a short time after infection. Waterlogging and insufficient drainage are often the causes.

Clematis pests

Nudibranchs + egg clutches

Snails
are the main enemies of clematis. It is mainly slugs that can cause major damage to clematis. Whole shoots fresh from the soil can be damaged just as much as leaves or flowers. Snails are nocturnal and hide near the plants in dark, damp places during the day. Control: In addition to collecting at dusk, chemical agents are also available. Plant pathogenic nematodes can be used for biological control.

Important to know!
There are also “useful helpers” among the slugs. The tiger snail. It eats other nudibranchs and their eggs. Furthermore, it lives only on dead plant parts and fungi. Not from green plant material! It should not be removed under any circumstances. Look out for them on your next garden tour. Not all nudibranchs are the same. Unfortunately, far too few garden owners are aware of this.

Weevils + larvae

Weevils and their larvae
For many years I have been observing the large spread of weevils on numerous crops. These persistent problem pests are mainly found on hard-leaved plants. When I look at rhododendrons, in gardens or in public green spaces, it becomes clear how big the problem can be. Roses and many garden shrubs can also be infested.

So far, the damage to clematis is still minor, but it is important to keep an eye on the problem. Typical is the feeding on the leaves. The nocturnal beetles cannot be seen during the day and only come out at dusk. Worse are actually the larvae of weevils, because they feed on the roots or the root collar. Growth depression is the result and the resulting wounds create entry points for fungal diseases.

There are very effective biological agents for controlling weevil larvae.

Black aphids are “milked” by ants
1st generation aphids with wings

Aphids
can occur on all cultivated plants. They cause damage by sucking on the plant sap. The first generation of aphids to hatch from the winter eggs is winged and spreads through our gardens at the end of April. One wonders where they suddenly come from. Wind and rain transport the aphids over several hundred meters. Later in the summer, ants can also spread the aphids. If the infestation is severe, the shoot tips and leaves can be affected and stunted. Because many aphids are greenish, they are often only recognized late. Natural enemies are our small songbirds. If you create nesting opportunities, you will hardly have any problems with aphids. The same applies to harmful caterpillars. (see next article) Aphids are easy to control; if you want to get by without chemicals, you can use biocides.

Caterpillars from various Moths

Caterpillars
cause feeding damage in the period from May to October. The misshapen feeding holes are clearly visible and can be mistaken for snail feeding. However, no traces of mucus are visible here. They usually hide on the underside of the leaves and are not noticed. The control is comparable to the control of aphids. Many pesticides are effective against both sucking and biting insects.

Phytomyza clematidis adult fly

For several years we have been observing a strong increase in Phytomyza clematidis

A fly whose larvae cause crippling of the flowers. It has spread northwards from southern Europe. There is a certain time window during which the fly is active, by piercing the still closed flower buds and laying its eggs. The larvae hatch from these and eat the stagnant vessels while the bud is still closed. Even the buds themselves are not spared. They are slightly curved or misshapen. As time goes on, the crippling becomes more and more obvious. The time window for this damage is the month of May and this only becomes apparent in June, for example when Clematis viticella opens its first flowers. Clematis that flower earlier or much later are not affected. Control can also be carried out with various insecticides or biocides. Timely or preventive treatment is particularly recommended here.

Mice are unloved guests

Mice:
Various types of mice such as voles, field mice or house mice can cause damage to clematis. Voles feed on the roots and the result is that the clematis no longer grow quickly or stagnate. Occasionally they perish completely. Field mice or house mice feed on the above-ground parts. The stems are gnawed through and the sap flow is interrupted. A “withered appearance” becomes visible. The clematis looks as if the shoots have been cut through.

Other pests that can occur on clematis are earwigs, thrips, flower thrips, rapeseed weevils and spider mites.

Posted on

Clematis pruning recommendations

Pruning is an important topic for the successful cultivation of clematis!

Regardless of the planting date or the later flowering date, you should carry out a so-called “pruning”. The newly planted clematis should be cut back approx. 20-30 cm above the ground in November or December of the year of planting. In the case of spring-flowering clematis, for example, it is best to forgo the few flowers in the first year and think about a well-branched, bushy and vigorous plant in the long term.

The following pruning rules are then followed in subsequent years.

Clematis experts, gardeners, hobby gardeners and authors of books all agree that all clematis are divided into three different pruning groups. These cutback groups are labeled 1, 2 or 3 or A, B or C.

There is widespread disagreement about the date of pruning, especially with pruning groups 2 and 3, the question arises as to when to prune. Pruning in late fall or spring? Both are possible! Everyone must decide for themselves when to prune. There are advantages and disadvantages to both options, but I recommend pruning in November/December.

Clematis pruning – Group 1

Do not prune is often the recommendation – but this is not quite the right way to put it.

It would be more correct to say: pruning yes, in May-June and not in November-December.

This rule applies to numerous spring-flowering plants as well as wild species and their varieties. This primarily includes the entire C. alpina (atragene) and C. montana. Both groups of species lay their spring buds in the summer and fall of the previous year. The flowering period itself then begins the following spring after the winter dormancy. Young leaves and flowers then appear at the same time. This development is called “flowering on the previous year’s wood”, a common phenomenon in woody plants such as forsythia or fruit trees.

All spring-flowering plants tend to senesce, so it is all the more important to prune them at the right time! Cut back to the desired size. The plants then have enough time to grow and produce buds for the following year. Partial pruning is also helpful, especially in the case of Montanas, which can be limited to a few shoots of different lengths.

Clematis pruning – Group 2

Clematis pruning - example pruning group 2

Cut back lightly every year in November/December (shorten all shoots by half). This is a pruning height of approx. 60 cm to 120 cm above the ground. Cut back younger clematis at 60-80cm, older clematis between 80-120cm. Use on clematis hybrids that flower twice a year. In my descriptions, these clematis are listed with flowering dates of 5/6 (May-June) and 8/9 (Aug.-Sept.). Heavy pruning to 30-40 cm above the ground is recommended every 4-5 years to rejuvenate the clematis and keep it vital.

All clematis hybrids in this pruning group flower in spring in the lower section on the short shoots that emerge from the “previous year’s wood”. After the first flowering period in spring, new shoots (long shoots) are formed, which then flower again in summer/late summer.

Many double-flowering clematis hybrids only produce double flowers on these short shoots in spring!

The second flowering period in summer/late summer is often unfilled or semi-double in such clematis varieties. There are some clematis exceptions that also flower double during the second flowering period, e.g. Multi-Blue.

Typical of these clematis varieties is the abundant fruit set after the first flowering period. These fruits should be cut off and removed together with the pair of leaves underneath, so that the shoots will grow back quickly and the new shoots will then flower profusely again in about 6 weeks!

Clematis pruning – Group 3

Pruning

Cut back all shoots vigorously every year in November/December (to 20 to 50 cm above the ground). Used for numerous Clematis hybrids and Clematis wild species that flower exclusively in summer. All these species and varieties produce long shoots that end in a mass of flowers. These include, for example, Clematis viticella, Clematis texensis or Clematis hybrids such as Jackmanii or Rouge Cardinal. Without pruning, such clematis would become more and more bare from below. Certainly not harmful in some planting positions, e.g. with shrubs or climbing roses, i.e. the pruning height can be individually adapted to the local conditions.

Posted on

Fertilizing clematis

The question of the correct fertilization of clematis is often asked. The fertilizers in use today are more varied than ever before! Which fertilizer is used is a matter of opinion. What are the main differences between mineral fertilizers, stored fertilizers, slow-release fertilizers, liquid fertilizers, nutrient salts, mixed organic/mineral fertilizers, organic fertilizers, vegan fertilizers, organic stimulants and soil additives?


Overview of the various fertilizer substances that are commercially available

Fertilizer preparationDuration of effectMechanism of actionAdvantagesPractical tip
Mineral fertilizer Complex fertilizer2 – 3 weeksWater-soluble granules, dissolves quicklyFast initial effectNo long-term effect
Stock fertilizer Complex fertilizer6 – 12 weeksGranules dissolve slowly over timeEasy to useHardly any overfertilization
Slow-release fertilizer Complex fertilizer3 – 12 months depending on the preparationCoated fertilizer with membrane effectContinuous nutrient releaseFamiliarization helpful and improves the effect
Liquid fertilizer Complex fertilizer5 – 7 daysDissolved in irrigation waterImmediate effectShort effect
Nutrient salt complete fertilizer, single-nutrient fertilizer7 – 14Dissolve in the irrigation waterHigh percentage, quick effect Very economical!No long-term effect
Mixed fertilizer, organic-mineral Complete fertilizer3 – 6 weeksGranules, partly water-soluble and microbiologicalEasy to useLow nutritional values
Organic fertilizer Complete fertilizer or single-nutrient fertilizer3 – 30 weeksMicroorganisms convert the substance into plant-available nutrients.Simple application, low salt contentIncorporate, low nutritional values.
Vegan fertilizers Mostly complete fertilizers2 – 12 weeksMicroorganisms convert the substance into plant-available nutrients.No salt damage, low Co2 loadIncorporate, low nutritional values.
Bio-stimulants 1 – 3 different componentsUp to one yearSoil fungi and bacteria that occupy niches and form symbiosesWithout chemical additivesSome highly effective substances
Soil – additives Mostly one substance6 – 18 monthsWater reservoir, air reservoir, loosening upIs helpful for soil improvementMany different substances are available
Lime (PH value increase)


6 – 8 monthsWater-soluble, powder or granulesImproves soil lifeImportant cell building block! Indispensable for acidic soils!
Trace elements,
Micronutrients such as: Mg, Fe, Cu, B, Mn, Mo, Zn
3 – 6 months
in most
Contains complete fertilizers
Water-soluble powder
or liquid
Improves leaf coloration, assimilation and many important processesIndispensable cell building blocks


I have deliberately refrained from naming individual preparations here, because everyone prefers a favorite fertilizer that is used. Rose fertilizer, perennial fertilizer, flower fertilizer or tree fertilizer can be used. You can get them in garden centers, country stores, DIY stores, nurseries or discount stores.

When fertilizing clematis, it is important to use a dosage that is adapted to the plant’s development!

The manufacturer’s instructions must be strictly adhered to, because a lot does not help a lot!

Complete fertilizer

Complete fertilizers (NPK), as the name suggests, contain all the main nutrients and trace elements! The various types of fertilizer differ in their composition, sometimes significantly. The higher the numbers, the higher the fertilizer yield!

Example: NPK stands for: N = Nitrogenium Nitrogen, P = Phosphorus, K = Potassium. The letters are accompanied by numbers that indicate the percentage of the individual nutrients.

After prolonged rainfall, it makes sense to top up with a single-nutrient fertilizer, as N = nitrogen and Ca = lime in particular are quickly washed out and are no longer available to the plants. Yellowing is the result and increases rapidly.

A very popular, pure nitrogen fertilizer is horn shavings. It can take several months before the desired fertilizing effect is achieved, as soil organisms must first convert the substance and make it available to plants. This depends particularly on the temperature and humidity. The misconception that horn shavings alone are sufficient as a fertilizer is clearly answered at this point with “no is not enough”.

Organic fertilizer

An important note on the popular organic fertilizers. Most of these fertilizers come from factory farming. (horn meal, horn shavings, bone meal, guano, etc.) For example, the use of sheep’s wool as a fertilizer is new. Vegan fertilizers are becoming increasingly important. The use of green manure (alfalfa and legumes) should not be ignored either.

This contrasts with today’s high-tech fertilizers, which are becoming ever more sophisticated and efficient, also in terms of environmental compatibility and groundwater protection.